Step 1: Prepare the Crunchy Crust
Place the Grape-Nuts cereal in a food processor and pulse until it resembles fine crumbs. Reserve 1 tablespoon for decorating if desired.
Transfer the crumbs to a mixing bowl and combine with the melted reduced-fat butter spread and cinnamon.
Mix until the crumbs are evenly coated.
Press the mixture firmly into the bottom of a 20cm (8-inch) round pie dish or cheesecake pan.
Refrigerate while preparing the cheesecake filling.
Step 2: Make the Creamy Cheesecake Filling
In a large mixing bowl, combine the fat-free fromage blanc, extra-light cream cheese, and Greek yogurt.
Add the vanilla extract and sweetener.
Beat with an electric mixer until smooth, creamy, and completely combined.
In a small bowl, sprinkle the gelatin over 3 tablespoons of cold water and allow it to bloom for approximately 5 minutes.
Gently warm the gelatin according to the package instructions until fully dissolved. Do not boil.
Stir a few tablespoons of the cheesecake mixture into the dissolved gelatin to help equalize the temperatures.
Gradually mix the gelatin mixture into the remaining cheesecake filling until evenly incorporated.
Step 3: Assemble and Chill
Spoon the cheesecake filling over the prepared crust.
Use a spatula to spread the mixture into an even layer.
Cover and refrigerate for at least 4 hours, or until the cheesecake is firm enough to slice.
For the best texture, refrigerate overnight.
Step 4: Prepare the Homemade Cherry Topping
Place the thawed cherries, 100ml water, lemon juice, and sweetener in a saucepan over medium heat.
Cook for approximately 5–7 minutes, stirring occasionally, until the cherries soften and release their juices.
In a separate small bowl, mix the cornstarch with 2 tablespoons of cold water until smooth.
Slowly pour the cornstarch mixture into the simmering cherries, stirring continuously.
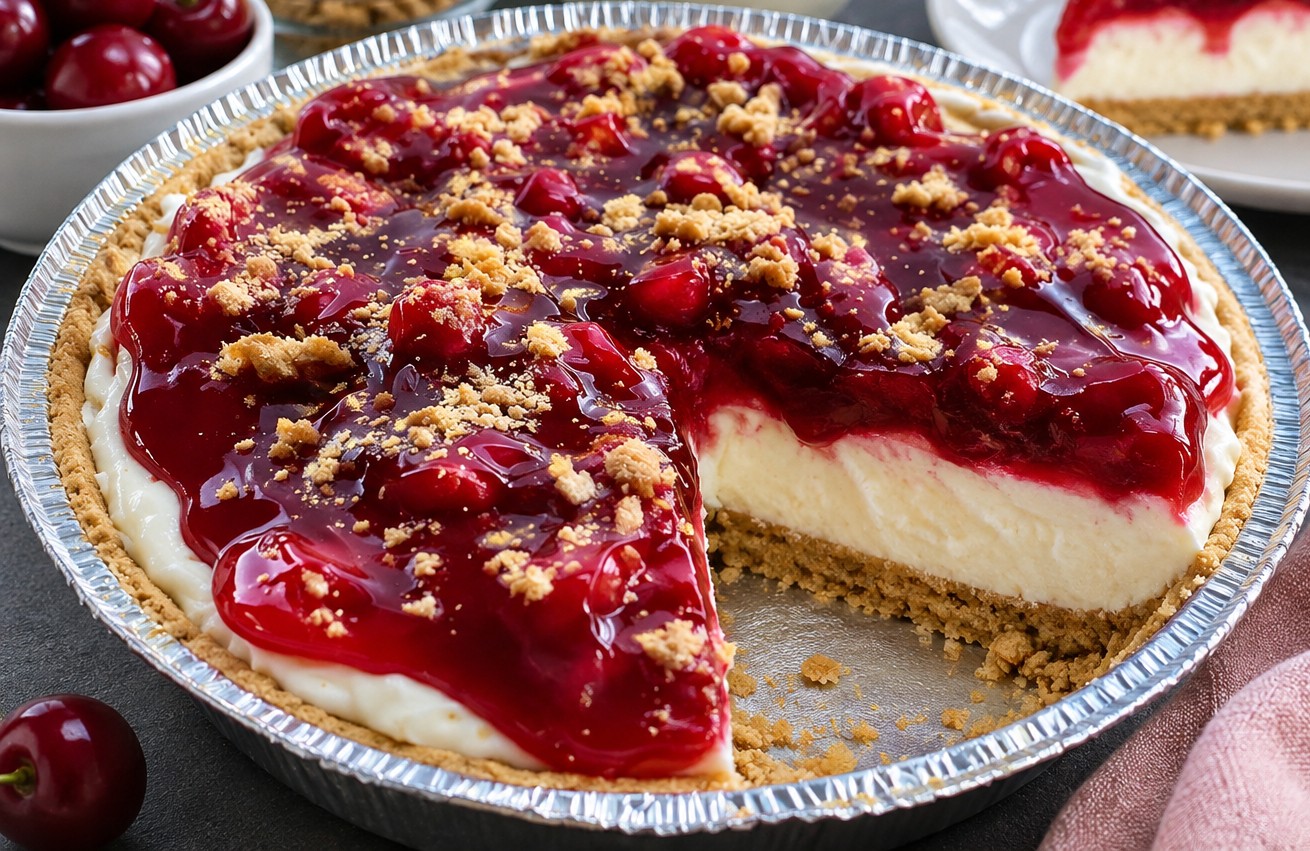
Cook for another 1–2 minutes until the sauce becomes thick, glossy, and rich red.
Remove from the heat and allow the topping to cool completely.
Step 5: Add the Cherry Topping
Once the cheesecake is fully set and the cherry mixture has cooled, spoon the cherry topping evenly over the cheesecake.
Spread gently to cover the creamy filling, allowing some of the white cheesecake layer to remain visible around the edges for a beautiful presentation.
Sprinkle with the reserved crushed cereal for a little extra crunch.
Step 6: Slice and Serve
Use a sharp knife to cut the cheesecake into 8 slices.
For cleaner slices, wipe the knife between cuts.
Serve chilled and enjoy!
Tips for the Best No-Bake Cherry Cheesecake
Use thick yogurt: Choose thick, fat-free Greek yogurt rather than a thin yogurt to help the cheesecake maintain its creamy texture.
Don’t skip the chilling time: Allowing the cheesecake to set for at least 4 hours helps create a firmer filling and cleaner slices.
Cool the cherry topping completely: Adding warm cherries to the cheesecake can soften the filling and affect its texture.
Adjust sweetness to taste: Different sweeteners vary in strength, so start with a small amount and adjust gradually.
Use a smaller pan for thicker slices: A 20cm (8-inch) pan creates a generous cheesecake layer.
Make it ahead: Preparing the cheesecake the night before gives it plenty of time to set.
Easy Recipe Variations
Strawberry Cheesecake
Replace the cherries with fresh or frozen strawberries for a sweet, summery variation.
Mixed Berry Cheesecake
Use a mixture of cherries, raspberries, and blackberries for a tangy fruit topping.
Chocolate Cherry Cheesecake
Add a little unsweetened cocoa powder to the cheesecake filling for a delicious chocolate-cherry combination. Adjust the sweetener as needed.
Individual Cherry Cheesecake Cups
Divide the crust, cheesecake filling, and cherry topping between 8 small dessert glasses.
Refrigerate until chilled and serve directly in the glasses.
This is a great option for portion-controlled desserts and entertaining.
How to Store Cherry Cheesecake
Store the cheesecake in an airtight container in the refrigerator for up to 3 days.
Keep it chilled until ready to serve.
For the freshest appearance, add any extra crunchy garnish just before serving.
Freezing is not recommended because the yogurt-based filling may become watery or grainy after thawing.
Frequently Asked Questions
Can I make cherry cheesecake without baking?
Yes! This easy cherry cheesecake uses gelatin to help the creamy filling set in the refrigerator, so there’s no need to turn on the oven.
Can I use frozen cherries?
Absolutely. Frozen pitted cherries work beautifully for this recipe. Thaw them before cooking and use their released juices in the topping.
Can I make this cheesecake ahead of time?
Yes. This cheesecake is ideal for preparing a day in advance. Refrigerating it overnight allows the filling to become firm and creamy.
Can I use fresh cherries instead?
Yes. Fresh pitted cherries are a great alternative when they’re in season. You may need to adjust the cooking time depending on their ripeness.
How do I make the cheesecake filling thicker?
Use thick Greek yogurt, avoid adding unnecessary liquid, dissolve the gelatin properly, and allow the cheesecake enough time to chill.
Is this cherry cheesecake lower in fat than traditional cheesecake?
This version uses fat-free yogurt, fat-free fromage blanc, and extra-light cream cheese in place of much of the full-fat dairy typically used in traditional cheesecake. The exact nutritional values depend on the brands and portions used.
Final Thoughts
This Healthy No-Bake Cherry Cheesecake proves that a lighter dessert can still be creamy, flavorful, and satisfying.
With its crunchy cereal crust, smooth vanilla cheesecake filling, and homemade glossy cherry topping, it’s a beautiful dessert that feels special without requiring complicated ingredients or baking skills.
Whether you’re preparing a family dessert, hosting friends, or simply looking for a lighter cheesecake recipe, this easy cherry cheesecake is sure to become a favorite.
Save this recipe for later and enjoy a delicious homemade cherry cheesecake whenever you’re craving something sweet!